


Getting the most from your Power Trowel
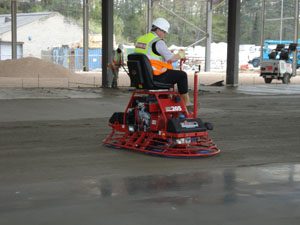
Finishing concrete has always been about timing: being in the right place at the right time with the right tool. Good power troweling techniques are essential since floor flatness depends directly on a finisher's ability to run trowel machines. The right tool and time The purposes of power floating are: to embed the large aggregate just beneath the surface of mortar to remove slight imperfections, humps, or voids to compact the concrete and consolidate mortar at the surface in preparation for other finishing operations. As I mentioned, timing is everything in finishing. The rule of thumb when to power float a floor is that your footprint should be 1/4 inch deep or less, with little or no bleed water present. Most floors that result in low F-numbers are the direct result of finishers getting on a floor too early with power trowels and creating lumps and bumps. Remember, this is the most plastic state that the floor will be in during a power floating sequence. Timing is everything — poor timing causes finishing problems. Also remember that any finishing operation done while there is excess moisture or bleed water on the surface can cause dusting or scaling.
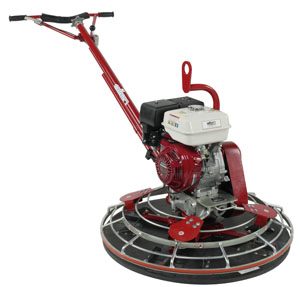 |
Choosing a walk-behind trowel When choosing a walk-behind power trowel, you should consider square footage/meterage, number of floor penetrations, concrete temperature, air temperature, wind, and relative humidity, along with mix design. Here are the recommended uses for various types of walk-behind trowels:
Rotor edging trowel (24-inch diameter): used on edges; pan recommended
Rotor edging trowel (30-inch diameter): used mainly on edges, patios, basements, and driveways; pan recommended
Rotor power trowel (36-inch diameter): used on small to medium pours, all types of floors; pan recommended
Rotor power trowel (42-inch diameter): used on medium to large pours, all types of floors; pan recommended 2 Rotor power trowel (46-inch diameter): used on medium to large pours, all types of floors; pan not recommended |
||||||||||
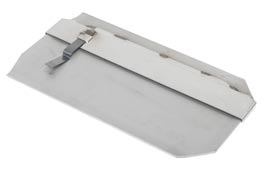
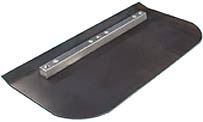
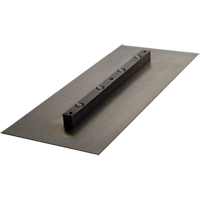
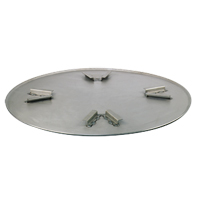
Blades and pans Once a machine is chosen, you must select carefully what type of blade or pan to use. Here are some tips to help with that decision:
Clip-on float blades:
|
 |
||||||||||
Combination blades:
|
 |
||||||||||
Finish blades:
|
 |
||||||||||
Float pans:
|
 |
||||||||||
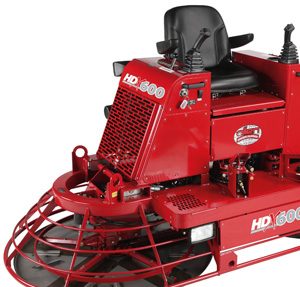 For the best results, the high performance and hydraulic-driven ride-on trowels are the most powerful on the market and are used on most large commercial jobs. These riders produce good horsepower-to-weight ratios for pans and will provide superior finishes. For the best results, the high performance and hydraulic-driven ride-on trowels are the most powerful on the market and are used on most large commercial jobs. These riders produce good horsepower-to-weight ratios for pans and will provide superior finishes. |
Choosing a ride-on trowel What size ride-on trowel should you choose? Use the following tips as a guide:
Nonoverlapping (NOL) double 30inch-diameter rotor ride-on trowel
|
||||||||||
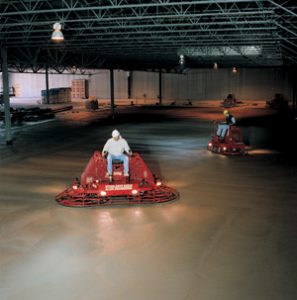
Ride-on trowel tips Once the floating process begins with a ride-on trowel, look for the windrow (the area between the two pans on a non-overlapping rider). Use the height of the windrow to determine when to start machining. Most finishers wait until the float pan creates a 1/4- inch to 1/2-inch windrow, therefore not displacing too much concrete. Signs of premature finishing would be:
As with all concrete floors, outside temperature, wind, relative humidity, and other factors determine how many passes one should make with a ride-on trowel. Here are a few guidelines experienced concrete finishers use:
After panning with a ride-on trowel, move ahead with the finishing procedure. A slight color change in the concrete signals that the floor is ready for the finishing process. To start the finishing process (remember combo blades are good for this transition), run two passes in opposite directions to remove bug holes left by the pan machine. As the concrete dries and hardens, increase the blade pitch to provide greater pressure to the concrete surface and to increase surface density. The final finish depends on the type of job and the specification.
Always remember, entrained air is not recommended in concrete for slabs to be given a smooth, dense, hard-troweled finish because blistering and delamination may occur. |
 |
||||||||||
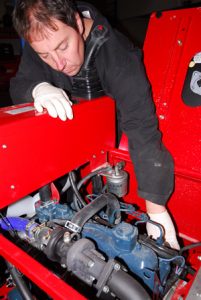  |
Maintaining power trowels When the pour is complete, proper maintenance of equipment is important. Inspect and clean trowels daily. A part covered with concrete can't be inspected. If your daily inspection shows something that appears to be worn out, make sure a trained mechanic checks it before you start working with the machine. Not only can you damage the machine, but you can injure another person working around you if you run equipment that is damaged, and worn blades or pans, bent arms, and other conditions can have negative effects on the final product. You can check trowel arms with a straightedge or level. It is always advisable to have extra equipment available in case the equipment or the weather cause problems, or the concrete requires more equipment than anticipated.
A maintenance checklist for ride- on power trowels (most of this also applies to walk-behind trowels) should include:
Daily:
Handling and transporting the equipment also must be monitored. Often more damage occurs while moving machines than while finishing a concrete floor.
Purchasing a walk-behind or ride- on trowel is a major investment. If you depend on your equipment to run day in and day out, it must be maintained and serviced properly. |
||||||||||
References Bob Simonelli is the precision flooring consultant for Allen Engineering Corp. Bob conducts training institutes for Allen Engineering, focusing on high-tolerance floor construction. His teaching method includes consulting and working "hands on" with crews to teach techniques. He has 20 years of field experience and is an ACI certified technician for flatwork finishing.
Extracts taken from Contractors Guide to quality concrete floors. |
|||||||||||
The information below is required for social login
Sign In
Create New Account