


Concrete Pour Checklist
Before proceeding with any concrete pour on a construction site, there are a number of checks required to ensure quality work is being carried out. No one should authorize a concrete pour without undertaking the following checks. If you don’t do these pre-pour 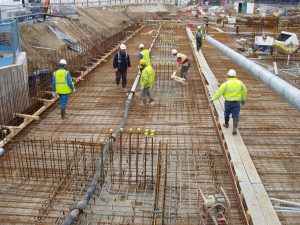 checks and your contractor knows this, they can start taking shortcuts to make life easier for themselves at the expense of quality and (potentially) safety.
1. Check your documentation.
Whether you are in charge of the construction or not, it is a good idea to be sure about what is going on. The documentation will let you know what hours you are allowed to work according to local laws. It will also include information about which machines are being used and what exactly is being done. Just make sure everything is in order.
2. Go over formwork.
The formwork is what you’ll be using to set the concrete. Because the concrete is being used for a specific purpose, it is important for the formwork to match the final design. The forms themselves also have to be in good condition. Typically this means that the edges all have the correct 90° angle and that the form is coated with mould oil to help release the form when breaking the forms.
3. Verify reinforcement.
The reinforcement is what will keep the concrete where it should be so it’s just as important as the frame to be perfect. Final plans will show you what the reinforcement should look like.
4. Set-ins.
In some cases when concrete is being poured, the purpose it is going to serve requires certain things to be embedded in the concrete when it is finished. Make sure that if there are supposed to be embedded items that they are in the right position to be exactly where they are supposed to be. This could include small ferrules, dowel bars, plates or large steel beams. If lifting anchors are required, ensure they are placed as per the manufacturer’s specifications to ensure safety when lifting the concrete unit afterwards.
p>5. Tool check.
The tools are another important part of setting in concrete. Make sure that the tools are in working order before starting to pour the concrete. If any of them have problems it’s important to know before starting the work. Also, have extras just in case they are needed should anything happen to the originals.
Do you have sufficient hand tools ready to place the concrete?
6. Check Again.
If you are not the person in charge of the site then the last step you need to take before pouring is to make sure that everything is ready according to your boss. They’ll be able to let you know if there needs to be any last minute adjustments or if something doesn’t match the drawings.
These steps need to be taken no matter what the job is for. This checklist helps you to be professional in your work and also can be a great way to prevent some of the most common mishaps that occur when working with concrete. Remember you only get one shot to get it right otherwise you will have a large bill in reinstatement costs.
The information below is required for social login
Sign In
Create New Account